This pattern from "V and Company" looks simple but can throw you a couple of "curves", pun intended. I made the purse for Bee Creative at the store so I took photos along the way which I hope will be helpful to you. Even if you are not making the bag, you can apply these tips to other similar projects.
Hint #1: Look before you cut. "Oh that's where that other pattern sheet was." Oops. Now we have one pattern available at a discount...8-).
#2: Bound zipper. Don't be afraid, just follow the steps below.
Draw a rectangle on the wrong side of the pocket where indicated on the pattern. Change your stitch length to 18 stitches per inch. Place the pocket right sides together with the bag lining as shown in the pattern. Stitch along that rectangle. Draw a line 1/4" from each short end of the rectangle. Draw a line through the center of the rectangle from 1/4" line to 1/4" line. Draw a line into each corner from the 1/4" mark forming a small triangle in each corner. Using small rotary (28mm) and a ruler carefully cut open the zipper opening along the center line STOPPING at the 1/4" line on each side. With a small pair of scissors, clip into each of the four corners following the small triangle lines STOPPING 2 threads before the stitching. If you happen to cut through your stitching, re-stitch the corner. Finger press the seam allowances open. Turn the pocket through the opening. Pay attention to those little triangles, that's where the puckers want to occur. If you press them flat you can eliminate puckers.

Finger pressing seam open.
There's that little triangle.
Press that triangle down to eliminate puckers, notice how I cut daringly close to the corner stitching, so brave!
You have completed the "bound" opening and earned your "I can make a bound zipper opening badge".
Bound zipper opening.
To add the zipper I use a water soluble, double sided, tape called Wonder Tape. This tape is 1/4" wide and dissolves in water. On the underneath side of the zipper opening (the inside of the pocket), place the tape along each edge of the zipper opening. Remove the protective paper from one of the tape strips. Position the zipper underneath your zipper opening centering it in the opening and stick in place. Repeat for the other side. No pins to skew your sewing or poke your fingers. Stitch from the right side of the lining using a zipper foot about 1/4" from the opening. I open the zipper about half way so I'm not running into the zipper pull, stitch until I reach the pull, leave the needle down in the fabric, raise the presser foot, move the zipper pull out of my way, lower the foot and continue stitching.
Wonder tape
Wonder tape in place
Protective paper removed from one tape strip, zipper stuck down.
Ready to stitch from right side.
Stitched!
The pattern doesn't call for adding batting to the strap but I prefer to have a firmer strap so this is what I did. I folded the strap as directed in the pattern, measured what the finished width was and cut a piece of batting this measurement wide and 1/2" shorter than the length. I also finished the ends of the strap before stitching by folding in a 1/4" on each short end and pressing. I felt that double folding the strap end when you attach the "O" rings would put my machine into overdrive so I wanted to make things easier for both of us.
Adding the batting.
Turning in 1/4" on each end.
Sewing uneven widths can be frustrating because the machine feed dogs want to eat the fabric rather than move it along. Well there's a solution for that. A compensator tool. Place it under the BACK of the presser foot behind the strap and your machine feeds the strap smoothly, no more smooshed beginnings.
The Compensator!
The compensator at work!
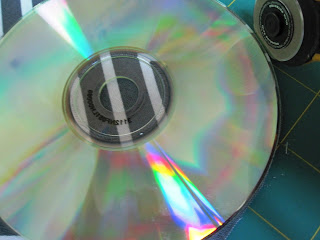
Okay, curves. You want them to look like curves and not zigzags. I use a 28mm rotary cutter to cut around the CD, stitched using 18 stitches per inch, trim using pinking shears. Pinking shears make lots of little bias cuts in the seam allowance which allows the fabric to ease into a curve. I also use a presser foot with a guide along the edge which helps me stay at 1/4".
Cutting around the CD.
28 mm Rotary cutter for curves.
Curve after trimming with pinking shears.
More later, I'm sure you are on overload.
Blessings,
Sharon


